Showing posts with label homebrew. Show all posts

Sunday, June 8, 2014

Simply Strawberry Mead

Heloooo all I am back again with another mead. Summer is here and the fruit is ripe! Strawberries have recently plummeted in price so I decided to pick some up. 5lbs to be exact. This is another mead that is somewhat in real time as it has been in secondary less than a week. Lets start off with what you need. 


Ingredients
  • 5Lbs of Strawberries not frozen
  • 1 gallon of quality water
  • 5lbs of Clover Honey
Nutrients
  • Pectic Enzyme
  • Yeast Nutrient
  • Yeast energizer

Yeast 
  • Lalvin K1-V116


First thing I did [that is not pictured] was take the strawberries and cut the tops off of them. I then put them in ziploc bags and smushed them up until they turned into a strawberry puree almost. I can hear what your brain is about to ask. "Why go through all the work of smushing them up? Why not just blend them?" The answer,like this mead, is simple. The seeds would impact unwanted flavors to the mead. After they were all squished up I put them in the freezer to let it freeze.[Freezing fruit helps the cell walls break down and the yeast can better extract color and flavor]

The next day I got my 2 gallon bucket and in it went the strawberries, summer berry honey,water and  nutrients. I took a gravity reading. I think it was off due to the strawberry particles. 
Once I got everything mixed in I whipped it up with a stick blender, [carefully so I wouldn't break the seeds] and got it nice and oxygenated, then I pitched my yeast. After a lag phase of almost a day, the yeast then took off!

These were once strawberries. This was like day 3 of it being in the bucket. 

Because the strawberry messed spread out like that, daily I had to break up the floating mass (aka a Cap in brewing circles) to keep the yeast from being unhappy/dead.

After about a week, she started to slow down so I decided to rack it as I did not want fermentation to be done all the way. 

You can see here how high it foamed up compared to where the actual liquid is. This is why I brew my melomels in a bucket. Pleeeenty of head space. 

I took another gravity at this stage. You can see here it is bone dry. I want you also to take noticed of the color. Noticed how it is a pale unattractive color? 


My astute readers will notice I said I bought 5lbs of strawberries and I only put 4lbs in the bucket. The extra pound is for secondary.

As you can see here, fresh strawberries will turn it from a pale, sickly color into a fantastic red. 

In the closeup you can see how the strawberries are barely even red anymore. All that color, and flavor will be going to the brew. 

And this is now where she sits. I must also clarify the photos of the carboys only show .5lbs of strawberries as there are two carboys. 

I plan to rack it soon at the time of this posting it has been in secondary for about a week. I might do a racking day post as I will have to rack The Midnight Cherry soon as well. 

Sunday, May 11, 2014

The Midnight Cherry Is Now In Secondary

Since we last were here not much action happened. I whipped air into the  brew in the first three days to keep the yeast happy. The gravity dropped down to 1.08. Which means, TIME FOR SECONDARY!

For those of you who are like "wut" go check out the first post to understand. 


This means it is time to rack. The yeast are pretty much out of food. 


Some people buy starsan. I just use bleach water with a thorough rinse. I have made almost 10 brews with no issues yet. 

That color is gorgeous. 

I wanted to added more cherry flavor so I picked up a can of cherry puree to split between the two jugs. I forgot to take a photo of the can, but it is the same can as the below photo. 
(Not my pic)

When they said puree they were not joking. This stuff was thinner than baby food. 
Here is where the midnight part comes in. Added more black currant juice. 

Not pictured is added .5lb of honey to the jugs as well. 

I sample the brew and while it is quite dry and fairly hot, the flavor is good and will likely improve with age. I also sampled the cherry, honey, black currant mix and that flavor was fantastic. I really think this will turn out to be a great mead. Now the wait. If these were on fruit pieces I'd rack in 2 weeks. Since I am using a puree I am going to just let this one sit for a while before I rack for clarity. 

I expect the next updated to be around 4-6 weeks from now. I will post an update then with any actions I take and how clear it is/is not. 

See you in some weeks!!

Tuesday, May 6, 2014

The Midnight Cherry Mead

Hello all! It's been a while since I have posted anything. Thankfully The Wife was holding it down. Any who it has been waaay too long since I have posted up a mead. A lot of my past meads were already in secondary or already bottled by the time I posted here. This one, however, will be posted up in real time. As of the date of this posting, this mead has been in primary for about 24 hours.

This post will also presume you are not completely new to brewing. So I will skip certain obvious steps, like sanitizing.
 To start I got my biggeset stainless steel pot and put the temp on low. To it I add 32 oz black currant juice and 32oz cherry juice.
 This stuff was tart, but dang good flavor.

 Same for the cherry, tart but good flavor.
 Next I heated up the honey in the bottle so it is easier to pour. Some people hate the idea of heating up honey, but I am fine with it as long as it is not boiling.


After you mix in the honey and get it all dissolved (*FOR THE LOVE OF EVERYTHING MAKE SURE IT DOES NOT BOIL) go ahead and dump your mixture into the bucket or carboy of your choice. I chose a bucket because it is my only piece of brewing equipment that is 2 gallons.

 A few photos of me taking a gravity reading. It is hard to read, but the gravity came to 1.060.
 These are the nutrients I use on my mead. Pectic enzyme to help break down the pectin so it is less cloudy. The other two are to feed the yeast.
 Next is time to aerate the mixture. I like to use my stick blender.
 .......So this isn't working.......
 Oh yea, crap, wrong stick. Got the one without holes on the top.
 YEEEAAAAA WHIP IT UP!!!


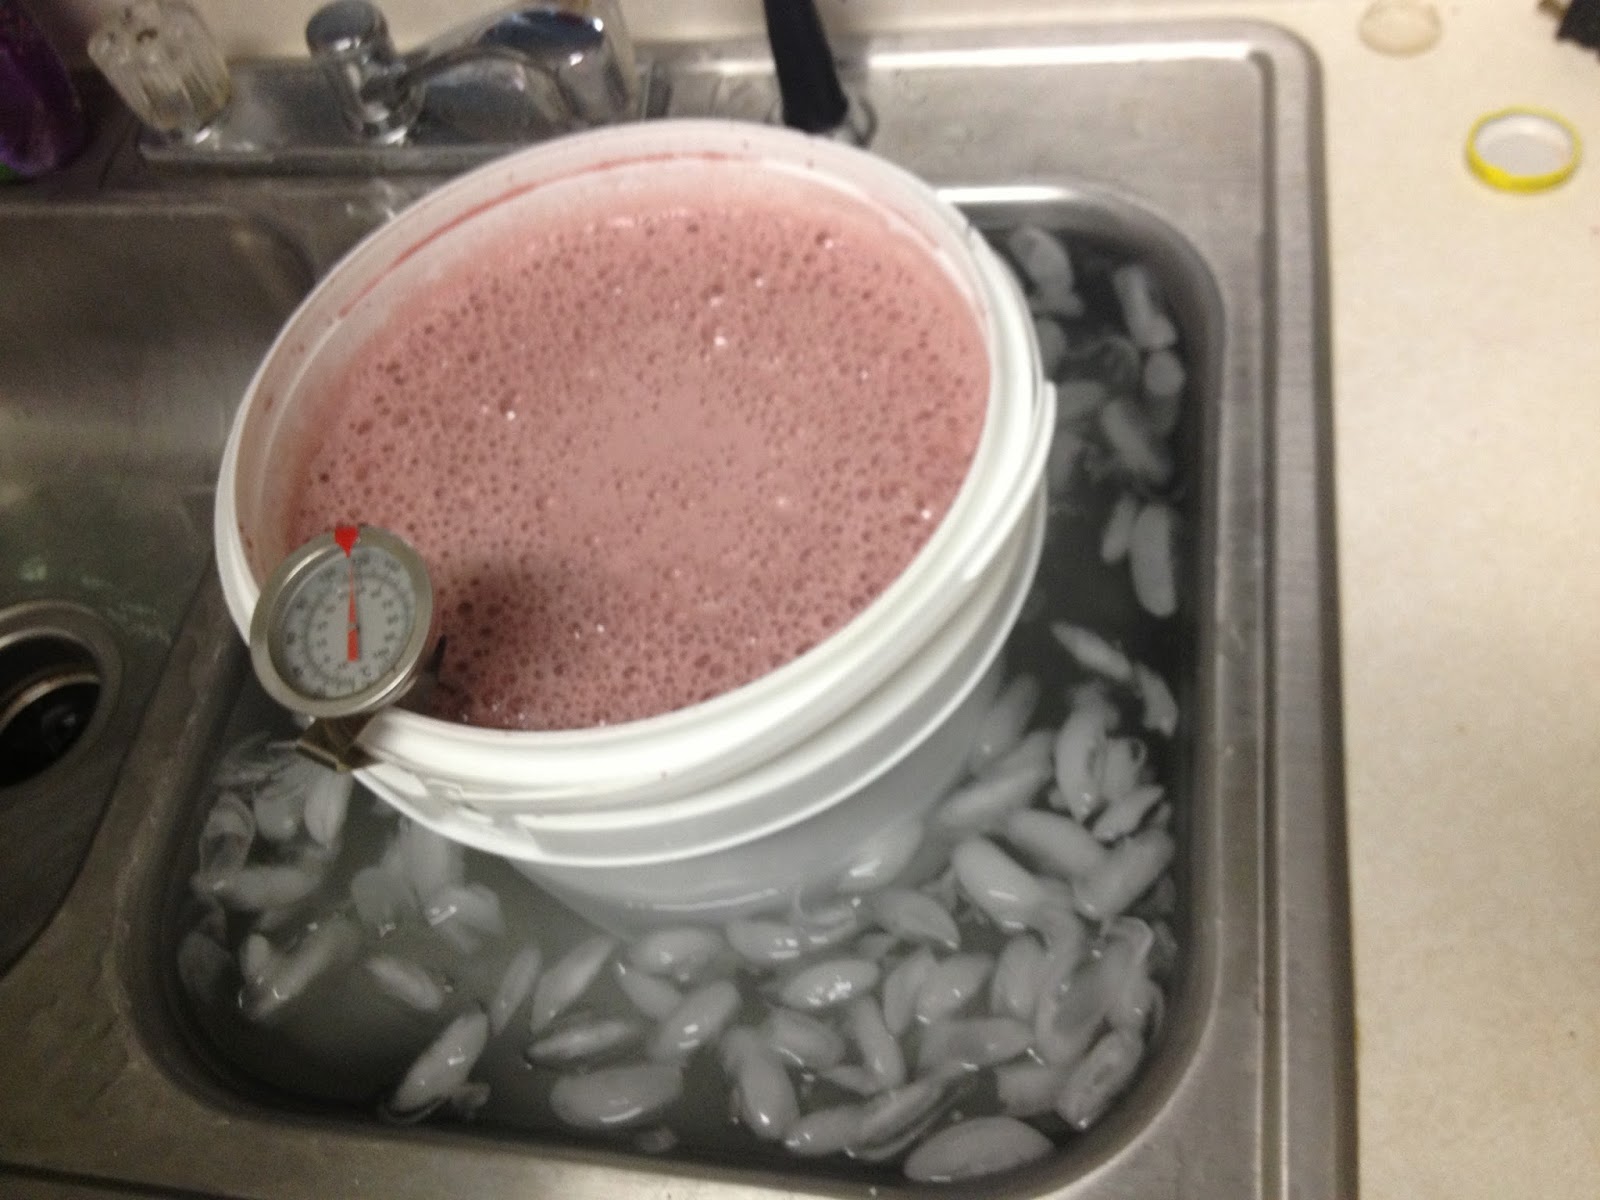
 Now that is more like it. Foamy, means bubbles and oxygen which is good for yeast. Also note how how that temp is. 
You cannot, I repeat CANNOT pitch  yeast at that temp. All you will do is kill them. 
So stick your brewing container into a clean sink full of water and ice and wait till it cools down. 


Much better! I like to pitch between 75-79 degrees. There are lots of docs on pitching temps. Do whatever works for you. 


I got my yeast slurry dumped in. After a lag phase of about 6-8 hours. She started to burp for me. Right now the container is in the closet burping along. I plan to aerate it daily to get some oxygen in there to help the yeasties. 

The second part will be up in two weeks when primary is over and we move to secondary. See ya in two weeks.  when the gravity drops. 

Wednesday, December 18, 2013

Showing You Guys What Exactly Goes On In a Bottling Day

Greetings all! I am back with another bottling day post. This time it is my Cocoa Cherry Mead. I had a bit too much headspace in the carboy and I was worried about oxidation as I was looking some color, so I decided to go ahead and bottle it and let if bottle age. Now instead of the obligatory bottle porn I normally post I decided to let you guys see what goes into bottling meads.

 Here you see my Blackberry[no post on this, too simple and not blog worthy] and Cocoa Cherry meads. The thing inside of the jug in the carboy is a racking cane. You pump it and it creates a vacuum that sucks the fluid down into the tube into a bottle.
 As you see here, the fluid flows into the bottle. The white clamp on the hose is what you press to stop the flow of liquid so you don't spill your precious wine all over the floor. 
And here is the bottle porn. I love the color on these. The left is Blackberry and the right is Cocoa Cherry. Despite the darkness of it, the last two on the left are blackberry too. 

Laters, next post I will show you how I made chicken for thanksgiving. If you have any questions/complaints/suggestions feel free to comment and let me know. 

Friday, November 15, 2013

Inexpensive Peach Vanilla Experiment Part 2 + Bottling Day

As some of you may recall I decided to do an experimental tossed together peach wine. TL:DR I made blended 3lbs of peaches with some sugar and tossed into a jug. Well after a while as wines do it started to clear. I added about a tablespoon of vanilla extract to it. It made the entire jug turn a darker color with a brown tint. As seen below. I almost went ahead and sorbated and sulfited it to kill off the yeast so I could backsweeten it later on.
 After I let it sit for another 2 weeks, I added enough sugar to it to sweeten it but not make it cloying sweet. No gravity readings as I still don't have a hydrometer due to an unfortunate tasting/measuring incident.

After The Wife and I moved to the new place and got settled in I figured I'd check on this and found it had cleared quite nicely. Faster than I expected honestly. I almost realized I have waaaaay too much head space and I risk oxidation if I tried to bulk age so I decided to bottle it.


See how clear she is?
 I could read the coffee pot numbers no problem. My phone would not focus on the numbers though. 
 Here is a sample in a glass
 I let The Wife's brother in law taste it and he said while it still had an alcohol bite to it, you could clearly taste the peach that was coming through. Sadly no vanilla though. I am hoping it comes out later as it ages. I will definitely make this one again, though next time it will be a proper mead with some good quality honey and secondary will have some vanilla sticks in it.

Those brown bottles are the wrap up to my quick cider. Honestly I don't know what to think of it. The taste has changed again though not for the better or worst, it just changed. The mouthfeel is still weird, like liquid glass. I decided to bottle it and forget about it for the next couple of years as I have heard that apple can take year to taste good. Hopefully so. If not, oh well its all in the game of brewing.

Comment, tell me what you think. Laters people!

Friday, August 2, 2013

Bottling Time 2!!!!!

Sup ladies and gents. Time for a little mead update. After waiting for quite some time, the Cranberry Mead has finally been bottled. This by car has been my most popular mead from the samples I have given. The big bottle is all mine, the smaller ones will be gift bottles. I don't know why the corks look like that. Someone told me next time to soak them in water to reduce the mushroom effect. I think I will open the big bottle a year or so from now. I need to make some labels.


I did not take a final gravity reading as I broke my hydrometer. I am excited to give these out. I already want to make another batch. Comment, tell me what you think!

Tuesday, February 26, 2013

Cranberry Fruit Tea Mead


The other day I was in the mood for some tea. We had this lipton caramel black tea which sounds delicious on paper. However in real life it is quite terrible. In attempts to make it taste something drinkalbe (I do not waste money) I poured in a bit of cranberry juice and gave it a taste


I was immediately struck by a thought...........this would make a pretty good mead. A recipe was born

Recipe
3.5lbs clover honey
2 cups Lipton Vanilla Caramel Truffle Tea- 2 teabags per cup
1 fresh tea bag in brew
24OZ cranberries fresh then frozen
Berries in a bag in 2 gallon bucket.
3 Cups of Northland Cranberry Juice (no preservatives)

Lavlin KV-1116
Yeast Nutrient
Yeast Energizer
Pectic Enzyme

I mixed the honey and water together on the stove to heat it up. I made sure not to let it bowl. I then added the tea and cranberry juice to the bucket. I put the berries in the bag.


Now you may be wondering, why a bucket? As you may remember with my strawberry melomel fruit makes mead foam. This is made using wine yeast and not just regular bread yeast so I wanted to make sure foam was not an issue. A two gallon bucket allows me to brew it with fruit and plenty of space for it to foam up with no clogged airlock.

To aerate I stirred with a spoon, the poured water in to around 1 gallon. I dissolved nutrients and pectic enzyme in water and added to mixture. Stirred again. Rehydrated the yeast per the instructions on the pack. While that was going on I again stirred the must to added the yeast in and also took a gravity reading. It read 1.092.

The first, 2nd and third days I aerated it once in the morning and again in the afternoon with a vigorous stir.

I let it go about 5 days on the berries, then I pulled out the bag and beat it with a sanitized pan so the berries would break open. It was a lovely shade of pink. I let it go another 6 days on the now crushed berries then racked it onto some potassium sorbate to kill the yeast off for backsweetning. The gravity was at 1.001 aka dry as sh*t.

Here it is on the left. It is a lovely shade of red. The jug next to it is the excess I made. Apparently I made a bit too much. I did not want to waste it so into a jug it went. Once the yeast dies off I will back sweeten then let it age to clear then bottle it. Depending on how much lees' (dead yeast) it drops I may rack it once more.

Thursday, February 14, 2013

Quick Cider

The other night while The Wife was out and about I was lazing around watching  youtube videos of brewing. I came across one in particular video where a guy fermented some apple juice to make a kind of hard cider.

I was instantly intrigued. I had The Wife bring home a bottle of apple juice, though because I wasn't clear enough she brought home a small bottle. I wanted enough for a gallon so I had to wait till the next day.

The following day I pick up a big bottle and a 2lb bag of brown sugar.


When I got home I got right to prepping. First rule of brewing, always sanitize everything. After I washed my items I let them sit in bleach water. A lot of brewers use starsan since it is no rinse, but I just used bleach. Bleach is considerably cheaper since a tablespoon per sink is all you need, plus rinsing is not that big of a deal.


I heated up the apple juice to an almost boil then dissolved most of the 2lb bag in, not sure how much. Like an idiot I didn't measure anything.

While that was simmering I rehydrated the yeast by warming up some water putting some sugar in then letting the yeast sit in it. After the sugar was all dissolved I dumped it into the carboy along with the yeast nutrient and tried to shake it, forgetting it JUST came off the stove. Notice how melted that ice is? That is after 2 mins. I put the carboy in an icebath for about 15 mins. I would alternate between the water and shaking it till I felt it was cool enough to pitch the yeast in.

After I got it shaken up nice and good I added the yeast in which by this point had formed a cloud looking shape in the dish. Means it was nice and healthy. I pitched it and put it into the carboy. Slapped the airlock on with a 80/20 vodka to water mix. It started bubbling very quickly.

As of this morning it was fermenting quite vigorously. It was burping about 1.5 bubbles per second. I plan to let it sit for a week, sample, see how it is.

Now keep in mind I know this is sloppily thrown together however that was the point. I just wanted to see how this turns out. Now if it comes out decent like this imagine how it will be if I put some thought into it by measuring, taking a gravity reading, using spices in it etc. I'll let yall know how it turns out.